
SUNSCENE / Technical Guides
How to install low-voltage landscape lighting
A successful low-voltage lighting installation begins with a simple plan: choose compatible fixtures and power equipment, lay out the system before burying cable, and test the lighting after dark. This guide covers the outdoor low-voltage side of a typical landscape lighting system. Follow the instructions supplied with your particular transformer, fixtures and connectors, together with local electrical requirements.
1. Plan the positions and cable route
Mark the paths, planting areas and architectural features you want to illuminate. Place path lights to guide movement without shining into people’s eyes; aim spotlights at the intended feature rather than windows or neighboring property. Keep fixtures clear of lawnmowers, walking routes and irrigation spray where practical.
Sketch the transformer position and each cable branch. Measure the actual cable route, including changes in direction, rather than just the straight-line distance. Check for buried utilities before digging and plan how cables will cross paths or other hard surfaces.
2. Confirm that the whole system is compatible
Check every fixture’s rated input voltage and whether it requires AC or DC. A 12 V AC fixture and a 24 V DC fixture are not interchangeable. Match the supply, lamp type, cable and connectors to the selected products. Add the rated wattage of all fixtures that may operate at the same time, then choose capacity and any operating margin according to the transformer manufacturer’s instructions.
Choose outdoor cable of the specified type and conductor size for the load and run length. Longer runs can cause voltage drop, so review the layout before buying cable. Do not assume a higher output tap is appropriate for every fixture: confirm the allowable voltage at the fixture.
3. Position the transformer safely
Use a transformer rated for the intended location. Follow its mounting height, orientation, ventilation and clearance instructions, and keep access available for adjustment and service. For a plug-in model, use an appropriate protected outdoor receptacle with the required GFCI/RCD protection and weatherproof cover. New outlets, hardwired supplies and work on mains wiring should be handled by a qualified electrician.
Disconnect the supply before assembling fixtures or making connections. Low voltage does not remove the need for correct wiring, moisture protection and overload protection.
4. Lay out and assemble the fixtures
Place the lights in their planned positions and lay the cable alongside them before securing or covering it. Leave the service allowance recommended by the manufacturer so a fixture can be adjusted without straining its connection.
Assemble stakes, stems and heads as instructed. Prepare the ground before inserting a stake; do not hammer on the light housing or force a fixture into hard ground. Use the specified mounting hardware for surface-mounted or hardscape lights.
5. Make weather-resistant connections
With the power disconnected, connect each light using the connector type specified for that fixture and cable. Follow any stripping, polarity, tightening and sealing instructions. Some systems use piercing connectors; others use sealed splices or dedicated plugs. They should not be treated as interchangeable.
Use connectors rated for the installation conditions, including direct burial when applicable. Keep exposed copper out of the weather and do not rely on ordinary tape as a substitute for an approved sealed connection. Connect the cable branches to the correct transformer terminals within the model’s circuit limits.
6. Test before covering the cable
Inspect the connections, then energize the system using the manufacturer’s startup procedure. Confirm that every fixture operates. If a light fails or appears unusually dim, disconnect the supply before checking its connection, lamp, compatibility and branch load. Where voltage measurements are needed, use a suitable meter and a person competent to make them.
Check both the nearest and farthest fixtures. Uneven output can indicate a connection issue, unsuitable cable sizing or excessive voltage drop. Resolve the cause instead of simply increasing the supply voltage.
7. Secure the cable and adjust after dark
Once the system works correctly, secure and cover the cable as required by local rules and the product instructions. Burial depth and protection depend on the cable, location and applicable requirements; there is no single depth suitable for every installation. Protect exposed sections and crossings from damage.
After dark, adjust spacing and beam direction, reduce glare, and check that steps and walking routes remain clear. Set the timer or light sensor for the intended operating period. Photograph the final layout and keep the model numbers, cable routes and transformer settings with your project records.
8. Keep the installation easy to maintain
Periodically inspect fixtures, connectors and exposed cable, especially after gardening, severe weather or changes to the landscape. Clean lenses as directed, trim planting that blocks the beam, and isolate the supply before servicing. Recheck the total load and cable layout whenever more lights are added.
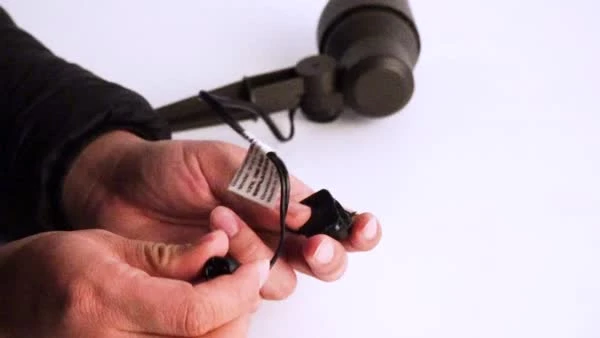
See a connector example
This product demonstration shows one connector arrangement. Use the connection method specified for your own fixtures and cable.
Choose the power supply first
For help matching voltage, load and controls, read how to choose a transformer for low-voltage landscape lighting. Then explore our landscape lighting range and share your planned layout with our team.
Have a specific project in mind?
Share your product list and requirements with our team.